

Have you ever had a moment when you’re all dressed up and suddenly you spot a problem with your outfit? Maybe it’s a tiny hole in your favorite shirt or a stubborn zipper that just won’t budge. Don’t worry! With some clever DIY clothing hacks, you can fix these issues in no time and keep your clothes looking great. Let’s dive into some easy and fun ways to tackle common clothing problems without needing a trip to the tailor.
Imagine you’re about to step out, and you notice a small tear in your shirt. No need to change! Just grab a piece of matching thread and a needle. With a few simple stitches, you can patch it up so well that no one will even notice. Now, what if your zipper’s stuck? Here’s a quick trick: use a pencil. Rub the graphite tip along the teeth of the zipper. This acts like a lubricant and helps the zipper slide smoothly. For those annoying sweater pills that make your clothes look worn out, don’t rush to buy a new one. Use a regular razor and gently shave the pills off. Be careful not to press too hard, or you might cut the fabric.
These diy clothing hacks are not just about saving money; they’re about being smart and resourceful with what you have. They’re quick solutions that can make a big difference in how you look and feel. By learning these simple tricks, you’re not only fixing your clothes but also adding a personal touch to your wardrobe. Plus, you’re extending the life of your clothes, which is good for your wallet and the planet. So next time you find a little clothing mishap, remember these hacks and turn a wardrobe malfunction into a non-issue.
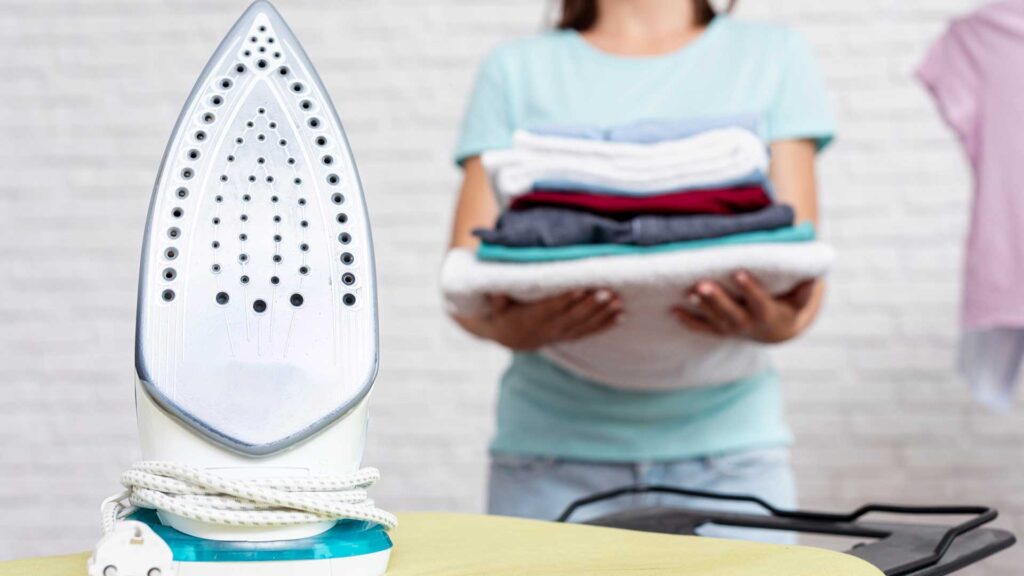
Wrinkle Removal Without an Iron
Ironing is not everyone’s favorite chore, right? Here’s a cool trick: If you have a dryer, throw your wrinkled clothes in with a couple of ice cubes for about 15 minutes. The ice melts and turns into steam, which helps smooth out the wrinkles. Neat, huh?
But why does this work? It’s all about the power of steam. When the ice cubes melt in the dryer’s heat, they create steam. This steam then gets to work on your clothes, just like the steam from an iron, relaxing the fibers and releasing those stubborn wrinkles. Plus, it’s a real time-saver compared to setting up an ironing board and ironing each piece of clothing individually.
Now, you might be wondering about the type of clothes this method works best on. It’s great for fabrics that can handle a bit of moisture and heat. Think about cotton shirts, linen blouses, or durable synthetics. But be careful with delicate items or clothes that have special care instructions, as the high heat and steam might not be so friendly to them.
To get the best results, don’t overload the dryer. Just like when you’re drying your laundry normally, the clothes need space to move around. This allows the steam to reach every nook and cranny, ensuring all the wrinkles are tackled. Also, once the dryer cycle is finished, take your clothes out immediately and hang them up or fold them neatly. This helps to lock in the smoothness and prevent new wrinkles from forming.
What if you don’t have a dryer? No problem. You can still use steam with a simple kettle or pot of boiling water. Hold the wrinkled garment about 12 inches away from the steam for a quick fix. Just be careful not to get too close to avoid water spots or burns.
Remember, with a little creativity and the right techniques, you can say goodbye to wrinkles even without an iron. Give it a try next time you’re in a pinch and see how it works for you!
Quick Fix for a Snagged Sweater

Discovering a snag on your favorite sweater can be frustrating. Don’t fret—there’s a simple solution that doesn’t require any sewing skills. All you need is a handy tool you might already have at home: a crochet hook. This small hook is perfect for repairing those pesky snags with ease.
Firstly, lay your sweater on a flat surface and locate the snag. This will make it easier to handle the repair. Be gentle—you don’t want to stretch or damage the fabric further. Take your crochet hook and carefully insert it into the loop of the snagged thread from the front side of the sweater.
Next, with a smooth motion, pull the hook back through to the inside of the sweater, bringing the snagged thread along with it. The goal is to move the snag to the inside where it won’t be visible. This technique essentially reverses the snag without harming the rest of the weave.
Once the snag is on the inside, you can decide whether to tie it off or leave it as is. Tying a small knot can prevent the thread from coming loose again, but be careful not to pull too tight as it might cause a pucker in the fabric. If the thread is long enough, you can weave it back into the sweater’s pattern with the crochet hook, hiding it completely.
And just like that, your sweater looks as good as new! This quick and easy fix saves you time and money, and extends the life of your beloved sweater. So next time a snag happens, remember, there’s no need to panic. With a crochet hook in hand, you’re all set to tackle the problem.
DIY Oil Stain Remover
Oil stains on your favorite shirt can be a real pain. But, there’s a simple solution right in your kitchen. All you need is some baking soda and hydrogen peroxide. These are common items that you might already have at home. Baking soda is great for absorbing oils, and hydrogen peroxide acts as a bleaching agent that doesn’t damage colors.
Here’s what you do: First, sprinkle a good amount of baking soda on the stain. Make sure it’s completely covered. The baking soda will start to soak up the oil. Next, mix a little hydrogen peroxide with the baking soda to make a paste. It should fizz a little—that means it’s working!
Now, grab an old toothbrush—one you won’t use for brushing your teeth again. Gently scrub the paste into the stain using the toothbrush. The bristles are perfect for getting into the fabric and helping the mixture work its magic.
One important tip: do this before you wash and dry your clothes. Washing machines and dryers can make stains set in, making them even harder to get out. So, treat the stain as soon as you can, and then you can wash your clothes as you normally would.
Remember, patience is key. You might need to repeat the process a couple of times for tougher stains. But stick with it, and you’ll see those oil spots disappear!
Get Rid of Pilling on Clothes
Have you ever noticed those tiny, annoying fuzz balls on your favorite sweater or shirt? They’re called pills, and they can make your clothes look worn out. But don’t worry, there’s an easy way to get rid of them. You can actually use something you probably already have at home—a regular razor. Just like you shave your legs or face, you can shave your clothes.
Here’s how to do it: Lay the garment on a flat surface and make sure it’s smooth. Hold the fabric tight with one hand. With the other hand, take a clean, sharp razor and gently glide it over the surface where the pills are. The key is to use a light touch so you don’t cut the fabric. Just like when you’re shaving your skin, you don’t want to press too hard or you might end up with a nick.
No razor handy? No problem. Another tool you can use is a pumice stone—yes, the same kind you might use for your feet. It can also lift those fuzzies right off your clothes. But before you start, it’s a good idea to test it on a small, hidden area of the fabric. This way, you can make sure it doesn’t damage the material. If the test spot goes well, gently rub the stone over the rest of the pilled areas. The rough surface of the stone catches the pills and pulls them away from the fabric.
Remember, whether you’re using a razor or a pumice stone, always be gentle. With a little patience, your clothes will look as good as new. And the best part? You’ve taken care of the problem with something you already had at home, without needing any special or expensive products.
Deodorant Marks Disappear
Have you ever noticed those pesky white streaks left on your clothes by deodorant? They show up out of nowhere and can be a real nuisance, especially when you’re wearing dark colors. But there’s a simple trick to make them vanish!
Instead of changing your outfit or trying to wash those marks out, reach for a dryer sheet. Yes, the same sheets that make your laundry smell fresh and reduce static can also help you here. Just take a dryer sheet and gently rub it over the deodorant marks. The fabric softening agents in the sheet will help to break down the deodorant’s residue.
This method is not only quick but also easy. Plus, it’s safe for most fabrics, so you don’t have to worry about ruining your favorite shirt. It’s perfect for those last-minute touch-ups before you head out the door. With just a swipe, your clothes can look as good as new, and you can step out in confidence, without any unwanted white streaks.
So next time deodorant leaves its mark, just remember: a dryer sheet is your secret weapon. With this tip, you’ll keep your outfits looking sharp and streak-free!
Banish Makeup Stains
Ever found a smear of lipstick or a dab of foundation on your favorite shirt? Don’t worry, there’s a simple solution right in your bathroom cabinet. Reach for the shaving cream! This household item is not just for smooth skin; it’s also a secret weapon against stubborn makeup marks.
First, gently blot the stain with a dry paper towel. Avoid rubbing; you don’t want to push the makeup deeper into the fabric. Then, take a dollop of shaving cream—any brand will do—and apply it directly onto the spot. The shaving cream acts like a pre-treatment, breaking down the oils and pigments in the makeup.
Now, patience is key. Let the shaving cream sit on the stain for about two minutes. This gives it time to work its magic. Afterward, carefully rinse the shaving cream off with cold water. If the stain is still there, you can repeat the process once more.
Finally, toss your garment into the washing machine. Use your regular laundry detergent and select the cycle recommended for the fabric type. Once the wash is done, your clothes should come out stain-free and looking fresh. Remember to check the stain is gone before you dry your clothes; the heat from the dryer can set the stain permanently.
With this trick, makeup mishaps are no match for your laundry skills. Say goodbye to ruined outfits and hello to spotless style!
Revamp Your Fancy Heels
Do you have a pair of heels that you only wore for a special occasion and now they’re just collecting dust? With a little creativity, those once-loved shoes can make a dazzling comeback. All you need is some fabric that catches your eye and a bottle of Mod Podge, which is a type of glue that also acts as a sealer and finish. It’s perfect for attaching fabric to shoes and leaving a smooth, protective layer.
Choose Your Fabric
First, pick a fabric that reflects your style. Maybe you love the sparkle of glitter, or perhaps a floral pattern speaks to you. Whatever you choose, make sure it’s a thin fabric so it molds easily to the curves of your heels. Cotton or polyester blends are great options to start with.
Prepare Your Heels
Before you begin, clean your heels with a damp cloth to remove any dirt or dust. This will help the fabric adhere better. If your shoes have any glossy finish, lightly sanding them with fine sandpaper can create a better surface for the Mod Podge to grip.
Apply Mod Podge
Next, apply a thin layer of Mod Podge to a small section of your heel with a brush. Work in sections to avoid the glue drying before you can attach the fabric. It’s a bit like painting a picture – you want to cover every bit of the surface, but not so much that it drips or creates lumps.
Attach the Fabric
After applying the Mod Podge, carefully place your fabric over it, smoothing out any wrinkles or bubbles. Press firmly but gently, ensuring the fabric sticks well to the shoe. Continue this process until the entire shoe is covered, and then trim any excess fabric for a neat finish.
Seal the Deal
Once your fabric is in place, brush another layer of Mod Podge over the top. This seals the fabric and gives your shoes a finished look. Don’t worry if it looks white and messy at first – Mod Podge dries clear! Allow your newly fashioned heels to dry completely, which can take a few hours.
And there you have it – with these simple steps, your once-single-use heels have transformed into a unique and personal fashion statement. Not only have you given them a second life, but you’ve also created a pair of shoes that’s truly one-of-a-kind. Step out in style and enjoy your handiwork!
Fix the Gap in Your Jeans
Have you ever noticed an annoying gap at the back of your jeans? It’s a common issue, but there’s a simple solution. All you need is a small piece of elastic to adjust the waistband for a snug fit. Let’s walk through the steps to fix that gap and get your jeans fitting just right.
Gather Your Supplies
First, you’ll need a piece of elastic about 3 to 4 inches long. Make sure it’s not too wide – a half-inch should do the trick. You’ll also need a needle and thread, or a sewing machine if you have one. Choose a thread color that matches your jeans so it blends in seamlessly.
Measure for Comfort
Next, put on your jeans and determine how much you need to take them in. Pinch the gap at the back of your waistband and measure the amount of excess fabric. This will tell you how much elastic you’ll need to remove the gap.
Attach the Elastic
Now, turn your jeans inside out and locate the center of the back waistband. Cut your elastic to the length you measured. Using your needle and thread or sewing machine, securely sew one end of the elastic to the waistband. Then, stretch the elastic slightly and sew the other end to the opposite side of the gap. Make sure the elastic is not too tight, as this will make your jeans uncomfortable to wear.
Test the Fit
After sewing, turn your jeans right side out and try them on. You should notice that the gap at the back is now gone and your jeans fit nicely around your waist. If there’s still a bit of a gap, you can adjust the elastic accordingly.
With this simple fix, you can say goodbye to that pesky waistband gap and enjoy jeans that fit perfectly around your waist every time you wear them.
No More Static Cling
Have you ever noticed your clothes sticking to your body like a magnet? That’s static electricity at work! It’s not magic; it’s just science. Static happens when different materials rub together, like your clothes in the dryer. Electrons jump from one fabric to another, and that leaves them with an electric charge. This charge makes your clothes cling together or to your skin. It can be pretty annoying, especially when you want to look your best.
But don’t worry, there’s a simple trick to banish that cling. All you need is a common object you probably have lying around at home—a safety pin. Here’s what to do: grab a safety pin and attach it to an inner seam of your clothing. The metal in the safety pin helps to break up the electric charge on your clothes. This means they won’t stick to you as much. Make sure the pin is in a spot where it won’t poke you or be seen by others.
Why does this work? The safety pin conducts electricity, which means it can help to redistribute the static charge more evenly across your clothes instead of letting it build up in one area. And just like that, the cling is gone! It’s a quick and easy way to make sure your clothes stay put. So next time your skirt or pants are getting too clingy, remember the safety pin trick. It really works!
Remember, this is just one of many ways to tackle static cling. There are other methods, like using special anti-static sprays or even a wire hanger. But the safety pin is a great solution because it’s simple, effective, and practically free. Give it a try and say goodbye to those awkward static moments!
Turn Any Bra into a Racerback
Have you ever found the perfect top but realized you don’t have the right bra to wear with it? If the top has a racerback style, which means the shoulder straps come together in a V shape in the back, you might think you need to buy a new bra to match. But there’s a quick fix you can do at home with something you probably have lying around: a paperclip!
What You’ll Need:
- A paperclip – large ones work best!
- Your regular bra with straps that you can adjust.
Step-by-Step Guide:
- First, put on your bra as you normally would.
- Then, take a paperclip and slide one bra strap into one end of the paperclip.
- Pull the other strap over to the paperclip and slide it onto the other end.
- Adjust the straps so they feel comfortable and secure. You might need to tighten or loosen them a bit.
This clever trick pulls your straps together, hiding them from view and giving you the racerback style you need. Plus, it can also give you a little lift and create a more flattering shape under your top.
Extra Tip: If you find the paperclip uncomfortable or if it shows through your top, you can look for a special bra clip at a clothing store or online. These clips are made just for this purpose and come in different shapes and colors to better fit your needs and stay hidden under your clothes.
So, the next time you’re in a pinch, remember this handy method to transform your bra. It’s a simple solution that saves you time and money, and it lets you wear that stylish racerback top with confidence!